

how to draw a realistic bee
Bees are the foundation of many of the systems on world, and we take a lot to thank them for. These powerful and organized niggling insects are loved throughout the world, with their light gauze wings and signature striped bodies. In this tutorial, we guide y'all through the steps to create an piece of cake bee drawing. Our bee cartoon tutorial is suitable for artists of any level, making information technology easier than ever to learn how to describe a bee in a few simple steps.
Table of Content
- ane Creating a Realistic Bee Drawing in 20 Uncomplicated Steps
- 1.1 Step 1: Constructing the Shape of the Abdomen
- one.two Stride ii: Cartoon the Thorax of Your Bee
- one.3 Step three: Outlining the Shape of the Head
- i.4 Step iv: Adding the Bee's Proboscis
- 1.5 Stride 5: Outlining the Bee'south Antennae
- 1.6 Stride half-dozen: Drawing the Wings of Your Bee Sketch
- 1.7 Footstep seven: Laying the Foundations of the Front Legs
- 1.viii Footstep 8: Crafting the Centre Legs
- 1.nine Footstep nine: Outlining the Back Legs
- 1.10 Footstep 10: Drawing the Heart of Your Bee
- 1.11 Step 11: Outlining the Pollen Ball
- i.12 Pace 12: Drawing the Concluding Outline of Your Bee Sketch
- 1.xiii Step 13: Creating Fur Texture and Details
- 1.14 Stride 14: Laying Downwards the Get-go Color Coat
- 1.15 Step 15: Coloring in the Bee's Wings
- one.16 Stride xvi: Painting Black Details
- 1.17 Step 17: Adding Dimension with Shadows and Highlights
- one.18 Step 18: Calculation Yellow Highlights
- 1.nineteen Pace 19: Blending Out the Color in the Wings
- i.20 Step 20: Adding the Finishing Touches
- two Often Asked Questions
- 2.1 What are the Best Tips to Make Bee Drawing Piece of cake?
- 2.2 Do You Demand any Special Supplies to Make a Bee Drawing?
Creating a Realistic Bee Drawing in 20 Simple Steps
Before first this tutorial, y'all likely have the impression that learning how to draw a bee is a difficult process reserved for merely the most professional artists. We hope to change your mind near this by the end of our piece of cake-to-follow tutorial when you volition have a stunning and realistic bee cartoon. When information technology comes to making bee cartoon easy, you are welcome to utilise any type of medium you lot like. Whether y'all dear to use soft coloring pencils, or y'all prefer a painting medium like watercolor or acrylic, you lot can hands modify the coloring stages to suit your preferences.
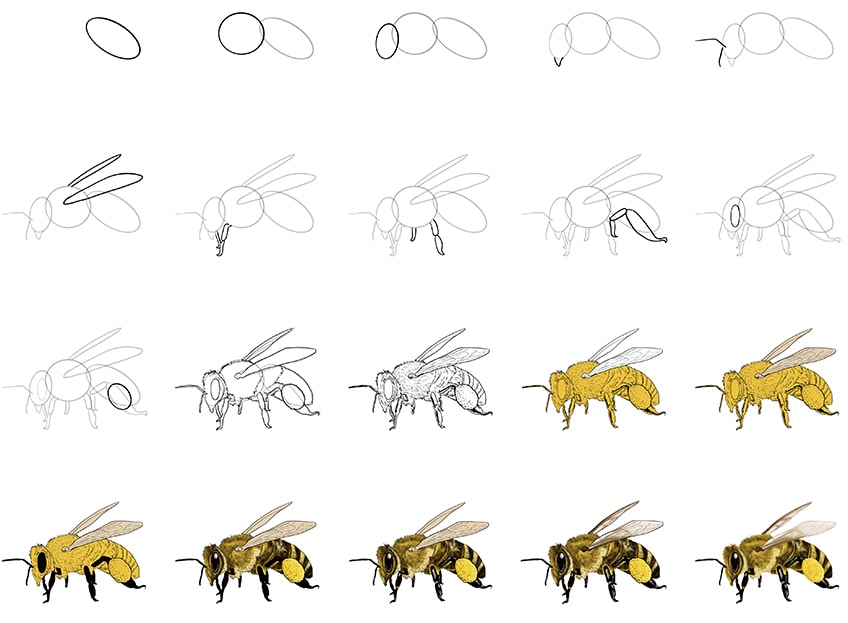
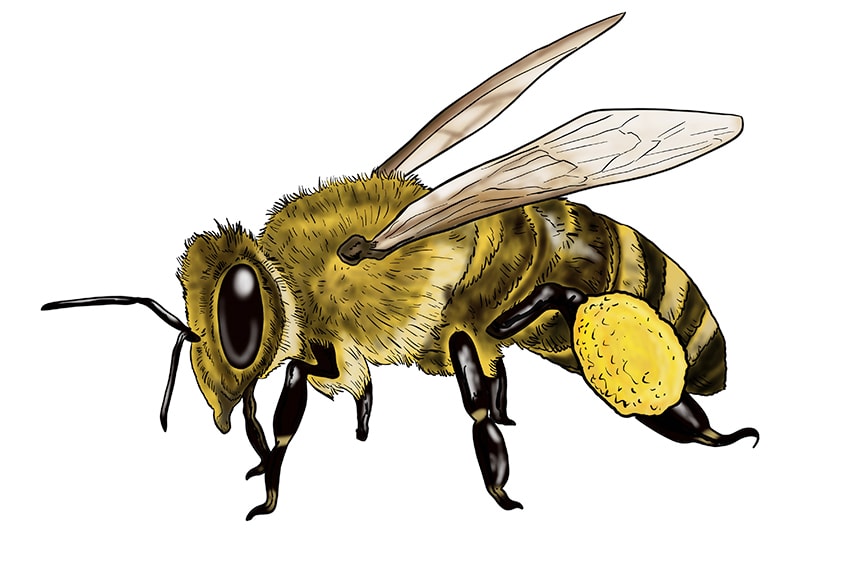
Another way that we brand bee cartoon easy is by using construction shapes and lines to map out the basic shape of your bee before you start adding textural and coloring details. Every bit bees are quite complex insects with a lot of different and delicate body parts, our first 11 steps are purely focused on construction. Yous tin see the general outline of our easy bee drawing tutorial higher up.
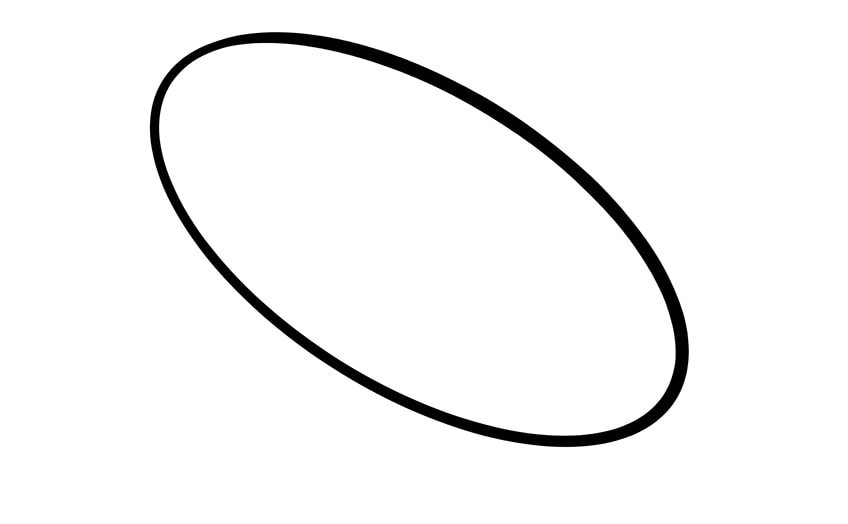
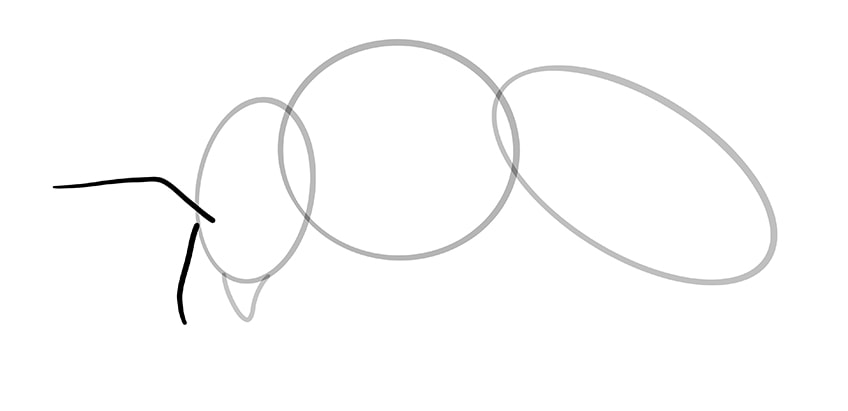
Stride 1: Constructing the Shape of the Abdomen
When information technology comes to using construction lines, it is always best to starting time with the largest part of the animal's torso. Equally such, for our bee cartoon, we are going to get-go past constructing the belly. For the abdomen, utilise a long and quite narrow oval to represent this office of the bee. The oval should be diagonally angled and should sit slightly off-center on your canvas as we are going to be drawing the rest of the bee on the left side of this abdomen.
The most important thing to consider in this first step is making sure that at that place is plenty of space all around this construction pace and then that you lot practise not end up with a slightly squished bee.
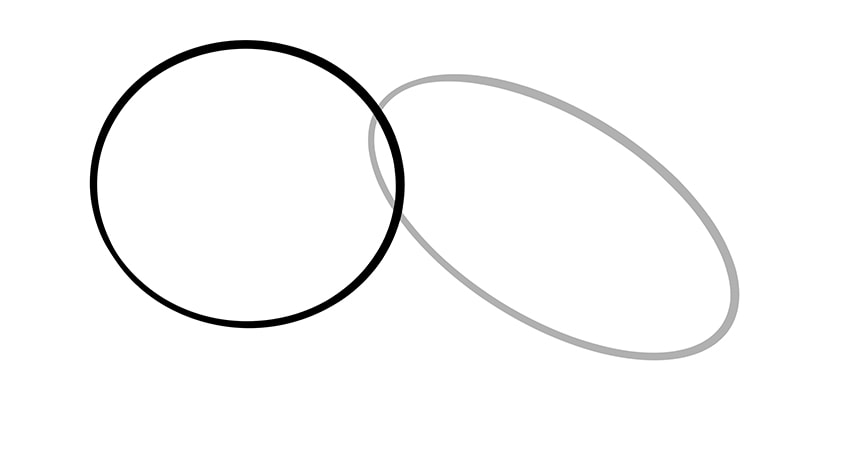
Step ii: Drawing the Thorax of Your Bee
For the thorax of your bee, yous are going to use a large circle. This circle should overlap slightly with the abdomen oval and the top of information technology should be slightly college than the highest point of the abdomen.
In terms of positioning, the thorax circumvolve should sit in the center of your canvas.
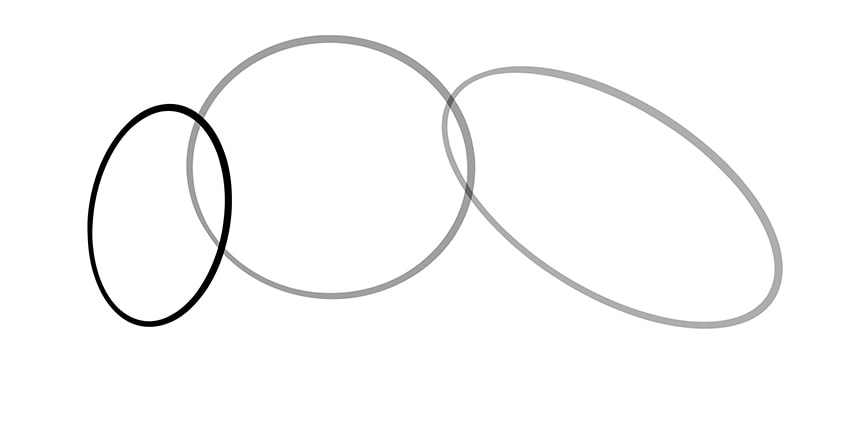
Step three: Outlining the Shape of the Head
The head of our bee drawing is long and narrow, then to construct information technology we are going to utilise a small narrow oval. The caput oval should be ever-so-slightly angled towards the back of the canvas.
Once again, the caput oval should overlap slightly with the thorax circle.
Step four: Adding the Bee's Proboscis
Bees are the nearly important pollinators in our ecosystem, and they do this by brushing against pollen while sucking the nectar out of the flowers. To suck upward this sweet nectar, bees use their pointy proboscis, which is what nosotros are going to draw in this footstep.
Using a slightly curved "5" shape, adhere the rima oris to your bee drawing at the very bottom signal of the head oval.

Step 5: Outlining the Bee'south Antennae
As nosotros continue to focus on structure, we are going to move on to laying down the basic shape of the bee antennae. Using two simple bent lines, attach the antennae to the left side of the bee's head, but below the halfway indicate.
To capture a realistic perspective, the top antenna should begin within the head oval and should be significantly longer than the other. The lower antenna can extend almost directly down from the side of the head oval and should be much shorter.
Step 6: Drawing the Wings of Your Bee Sketch
For the wings of your bee, y'all are going to use two long oval shapes. Begin with the upper wing which is significantly more narrow than the other and should begin and end at the upper betoken of the thorax circle. For the second wing, y'all can utilise a larger and slightly thicker oval shape that begins within the thorax circle.
The positioning and size of these two wings are essential for capturing a realistic perspective in your easy bee drawing.

Step 7: Laying the Foundations of the Front end Legs
Bees, like most insects, accept segmented legs but similar their segmented bodies. Showtime by drawing the front leg that is closest to us via our perspective. Begin past drawing a sausage-similar shape extending downwards from the thorax circle just behind the intersection of the head and thorax. At the bottom of this sausage, describe some other slightly more "Southward" shaped sausage that curves forward at the bottom.
The second front leg is mostly hidden backside the head, so we are only going to depict the bottom more curvey segment poking out from the head oval just beneath the oral cavity.
Step 8: Crafting the Middle Legs
Bees, like other insects, take vi legs, two at the front, 2 in the middle, and two at the back. It is at present time to construct the middle legs which extend from the thorax circumvolve. Brainstorm with the eye leg that is closest to the front of the body, and extends from the centre of the bottom line of the thorax circle. This leg is the one furthest from our view, so it will be similar the second front leg we drew in the last stride.
For the larger of the two middle legs, you lot can use the aforementioned pattern as for the big forepart leg, but this leg should be angled slightly towards the dorsum of the canvas.
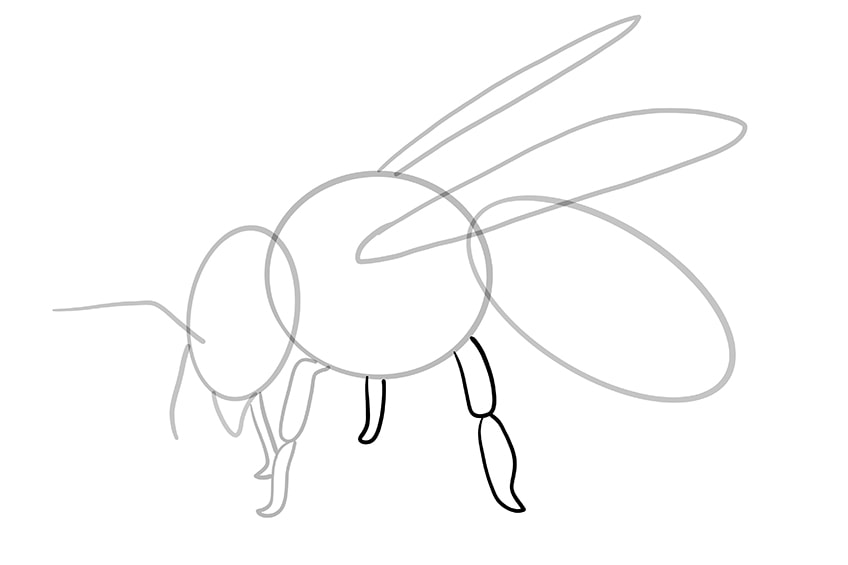
Step 9: Outlining the Dorsum Legs
The back set of the legs is the largest and begins inside the abdomen. Overlap the back belly drawing both legs at an angled joined together at the base of operations. The back leg should be much larger than all of the other legs you have fatigued and then far and should end with a pointy bend.
At the cease of this step, your cartoon should await a petty something similar our instance below.
Step 10: Drawing the Middle of Your Bee
Bees have very big optics, but a little smaller than the head oval. Within the caput oval, draw a slightly smaller oval that is slightly more vertical than the caput.
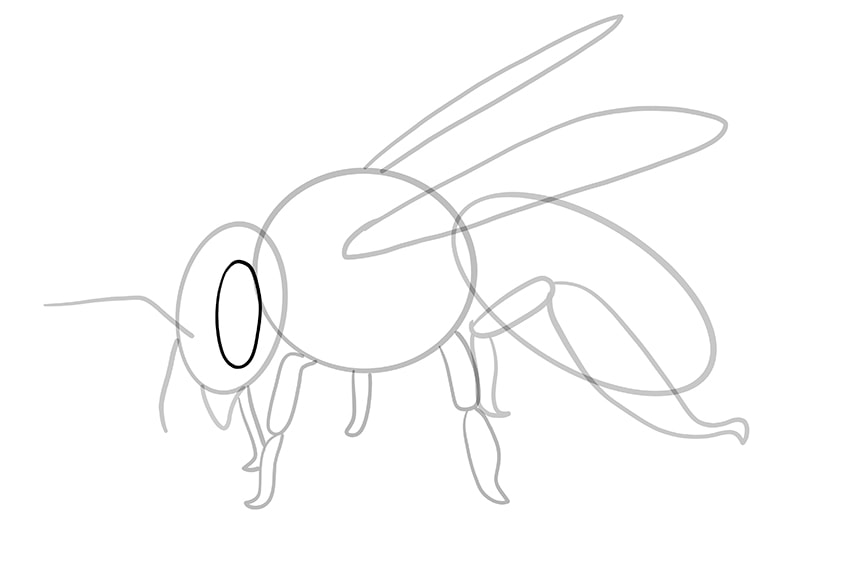
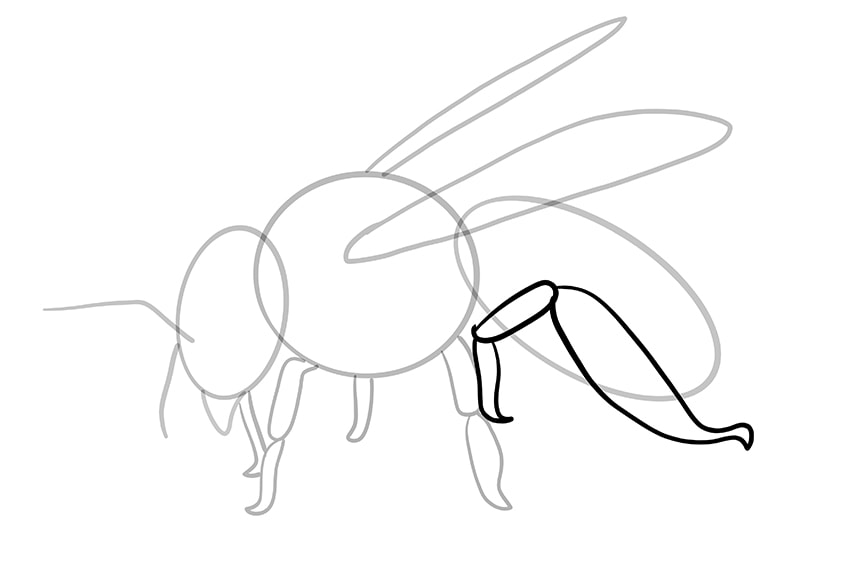
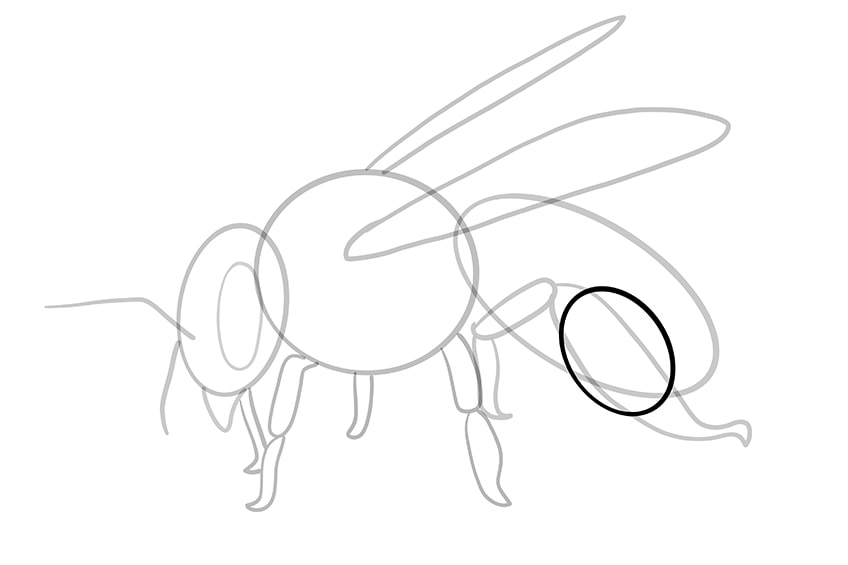
Footstep eleven: Outlining the Pollen Ball
To make our bee drawing as realistic equally possible, we are going to draw on a pollen ball. Pollen typically gathers on the large back leg, then over the largest function of this leg, describe an angled oval.
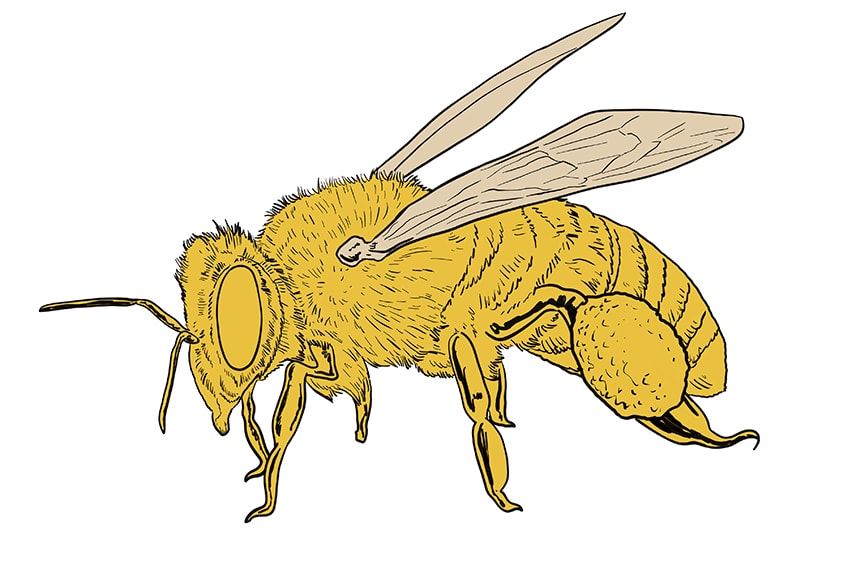
Step 12: Drawing the Final Outline of Your Bee Sketch
At present that we accept our bee synthetic, nosotros tin use these lines to create the final outline of our easy bee drawing. For the nigh part, you tin follow the construction lines very closely. Begin with the antennae, using the construction lines equally a middle line. You can and then outline the bee's caput, making information technology a little more pointy towards the mouth. When information technology comes to outlining the peak and dorsum of the bee's head, apply short feathery strokes to create the impression of fur, as bees have a fluffy advent.
You can continue to outline the rest of the bee'due south body using these same short hairlines. You can also create some divisions on the thorax and abdomen with this furry texture.
Use shine lines to craft out the shape of the wings, and you tin can outline the abdomen with a smooth line, bringing the bottom to a slight point. The legs should also be outlined with smooth lines, and you do non take to draw in the segmenting line only think to make the lines narrower at these joints to maintain the segments.
Upon completing this stride, you are at present prepare to erase any still visible construction lines.
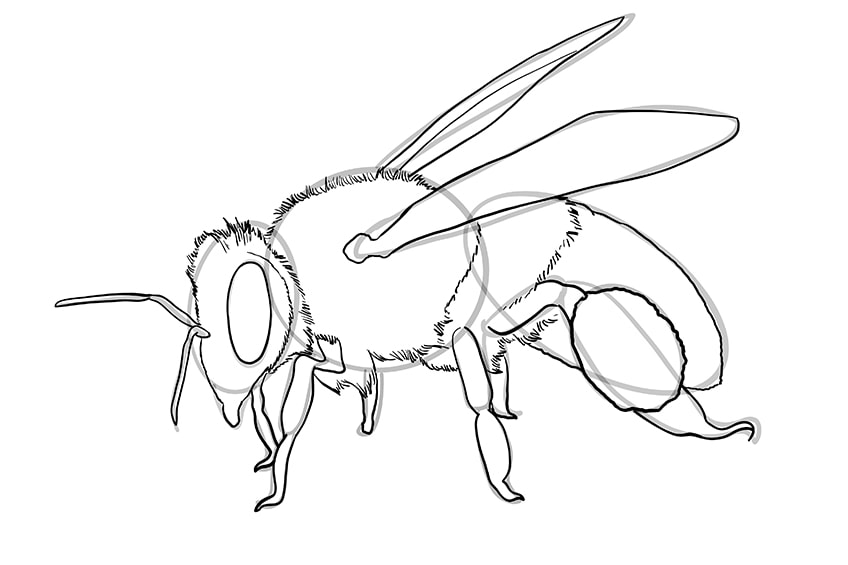
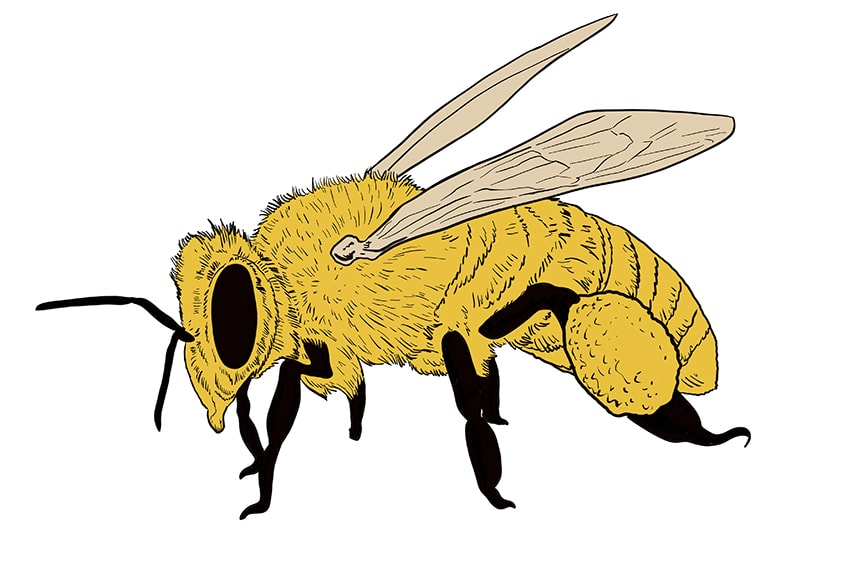
Step thirteen: Creating Fur Texture and Details
In our final step before adding colour, nosotros are going to add together fur textures and other details to our bee sketch. Begin past using short lines to create a segmented texture to the wings. These freehand line patterns should follow the direction and angle of the fly. While yous are working on the wing, you can add together some small textural dots and blobs to the base of the wing to give it more depth.
Side by side, move onto the thorax of your bee, using fur strokes to create texture. These fur lines should extend in an outward management from the base of the largest wing. Continue to fill the residuum of the bee's body with these fur lines, following the shape of each segment carefully.
When you go to the abdomen, yous tin can begin to use these curt lines to create the signature striped patterns. For the head, the fur lines should extend in a couple of rings around the eye. You tin can also add some darker shading to the antennae, and practice the same for the legs. These areas on the legs will be painted black in our coloring steps. To cease the detailing footstep, add together a few squiggly lines to the pollen sack, creating a bumpy texture.
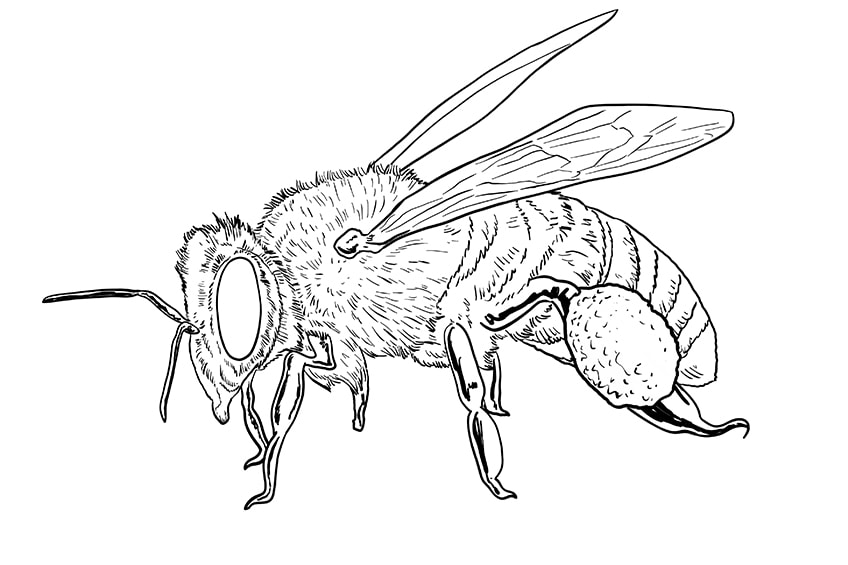
Stride fourteen: Laying Down the First Color Coat
For the base of operations color glaze, yous are going to use a single layer of xanthous to make full the entire body of your bee except for the wings.
Whichever medium you are using, brand sure that this base glaze is smoothen and consistent.

Pace 15: Coloring in the Bee's Wings
For the wings, nosotros are going to use a very light beige color equally a base. Use a fine brush to create a smooth and consequent coat of color, remembering non to make it also nighttime.
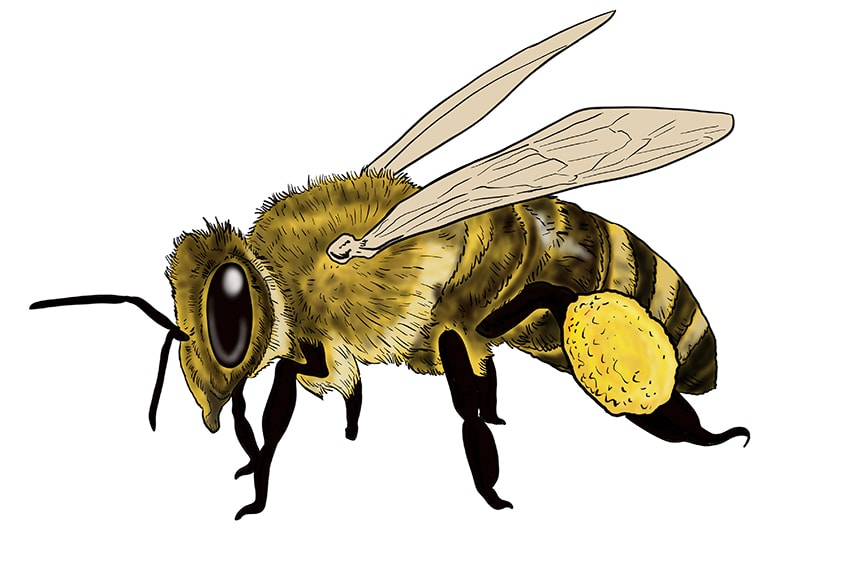
Step sixteen: Painting Blackness Details
The second prominent coloring in bees is black. In this step, take a shade of black and a fine brush, and color in the parts of the bee that are the near black.
Add this black shade to the antennae, eye, and legs.
Footstep 17: Calculation Dimension with Shadows and Highlights
You lot can meet immediately that there is a meaning divergence between the previous step and this step, but practice not be overwhelmed. This difference is cheers to shading which adds dimension and creates the right perspective. Begin by using a touch of white paint and a soft castor to lighten the cervix area that separates the bee's head and thorax. You can do the same at the separation betwixt the thorax and belly.
While you are using white pigment, add a softly blended highlight to the acme of the bee'south heart and create a very lite "U" shaped reflection that follows the lesser of the center curve.
It is at present time to focus on shadows. Utilise a small just soft brush to add together blackness shading to the fur around the head of the bee. Focus the blackness particularly on the parts of the head and body that volition naturally be subconscious from the lite, including the underside of the neck, and merely after the separation highlight between the head and thorax. As you motility onto the abdomen of your bee cartoon, use black shading to create alternating lines of blackness and yellow.
To go the smoothest alloy possible, lightly dab your castor onto the sail and gently smear information technology into place.
Step 18: Calculation Yellow Highlights
In this stride, we are going to utilize yellowish and white to create some additional highlights along the antennae and legs of your bee drawing. It is up to you lot where you lot would like to focus the highlighting, simply it is all-time to consider where the natural light would exist hitting the bee and apply that to guide your highlight choices. I identify we do suggest adding highlights is on the joint areas betwixt the leg segments. This highlight placement will emphasize the segmentation of the bee's legs.
If you need some guidance for where to identify your highlights, take a await at our example below for inspiration.
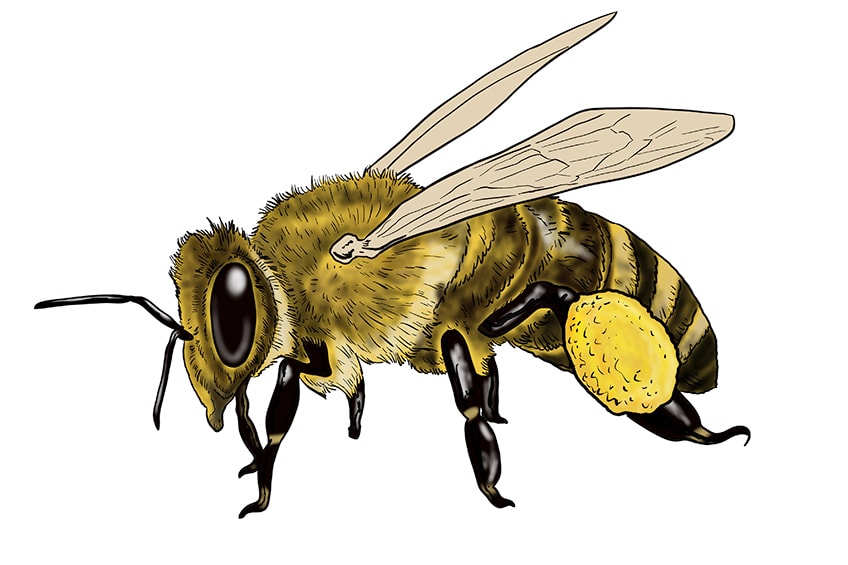
Footstep 19: Blending Out the Color in the Wings
To blend out the color of the wings and make them appear more opaque, you lot are going to use a shade of dark brown. Begin past focussing a calorie-free shade of nighttime dark-brown along the fly bone that is attached to the bee'south main body. You can then go on to softly blend this shade up into the wings, focussing virtually of the shadow along the bottom border of the largest fly, and ensuring that it gets lighter as you move up the wing.
For the smaller wing, blend the darker shade up along the peak segment as in our example below, in one case once again making certain that the color blends into the lighter shade as you get upward the fly.
Stride 20: Adding the Finishing Touches
The last step in this tutorial is optional, simply it is a lovely manner to create a smooth and seamless bee drawing. Yous simply desire to erase all of the outlines in your bee drawing by painting over them with the corresponding color of the area.
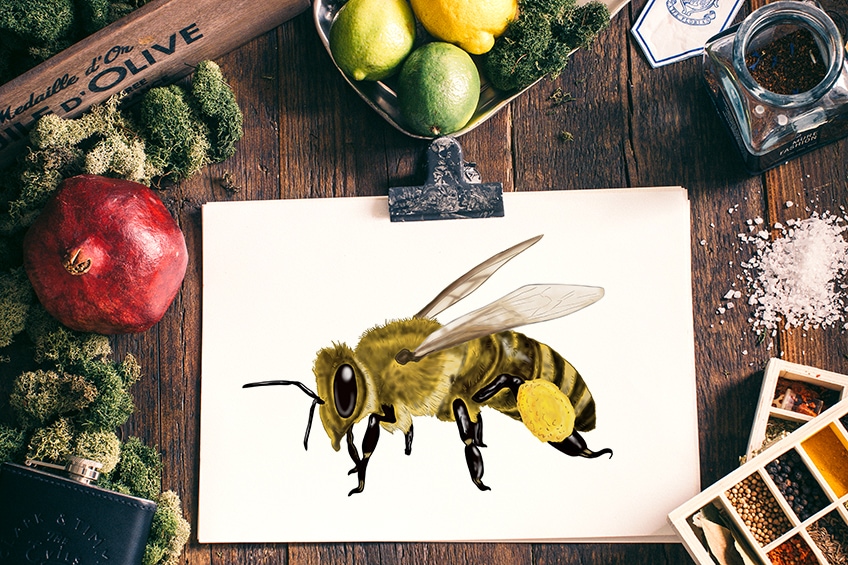
Well done for making information technology to the end of this detailed but like shooting fish in a barrel bee drawing tutorial. We hope that you have taken a lot from our guide, and that you now feel more confident with cartoon insects, using construction lines, and building upwardly realistic layers of color.
Ofttimes Asked Questions
What are the Best Tips to Make Bee Drawing Easy?
If you want to know how to create an piece of cake bee drawing, there are a few things you should consider. The first is to spend some time laying down the shape of your bee sketch with construction lines and shapes. Using construction lines will make bee drawing like shooting fish in a barrel because you lot will have the bones shape downwards earlier you demand to start adding detail. The 2d is to build the color upward in layers, which volition assistance yous make your bee drawing realistic.
Practise You Need whatsoever Special Supplies to Make a Bee Cartoon?
There is no special equipment or other drawing supplies needed to follow our easy bee drawing tutorial. Yous can use whatsoever drawing medium you like to create a beautiful and realistic bee sketch.

Source: https://artincontext.org/how-to-draw-a-bee/
Posted by: dollarsedid1987.blogspot.com
0 Response to "how to draw a realistic bee"
Post a Comment